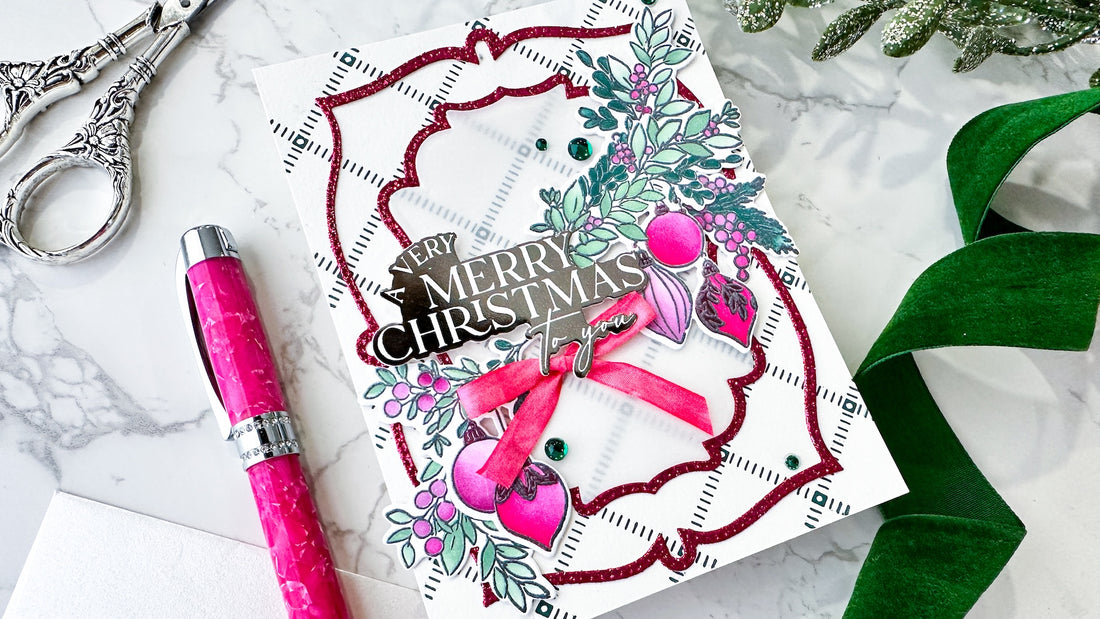
Stenciled Floral Christmas Swag in Pink and Green!
16 Dec 2024
0 Comments
Hi friends! Emily Midgett here with you today, and I have some holiday inspiration to share with you using the utterly lovely holiday set designed by the über talented Dawn Woleslagle. I love using unique color palettes for holiday cards, but sometimes I do lean in a more traditional direction, occasionally with a bit of a tweak. Today's project features the typical lush greenery that we associate with Christmas, but rather than pair it with traditional cherry red, I decided to use red-adjacent magenta to keep things super interesting! The washi tapes that Pinkfresh Studio offers are magnificent and so wonderful for mass production (hello, easy Christmas cards!) but sometimes, a different color palette is needed, so the stamps and coordinating stencils make that a piece of cake. Let's get started with the details on my project!

To begin, I stamped one of the one-go holiday foliage stamps from the
Deck the Halls stamp set that is such a time-saver: one stamp and one die and you have a variety of images with which to build your card front! I stamped mine with black pigment ink and then added some white pearl embossing powder, creating a pretty pearlescent charcoal. I then used the Deck the Halls Layering Stencils with
Raspberry Bliss, Lush Forest, Eucalyptus, Regal Kiss, and Candy Violet inks and the 1/2" blending brushes. I used the
coordinating dies to die cut all of the embossed and stenciled images with one pass through my die cutting machine. So quick and easy!

For the background, I paired
Lush Forest ink with the Stippled Plaid Press Plate. I don't think many images are as classically Christmas as plaid, and the lovely, delicate plaid pattern on the Stippled Plaid Press Plate worked beautifully to accent the lovely floral images. I pressed the background into a panel of creamy letterpress paper with the dark green ink, then decided to also accent the background with some Dotted Fancy Frames which I cut from some Magenta Glitter cardstock. I layered the two delicate and glittery frames on the letterpressed card front using liquid adhesive to complete my background before building my focal point.

For the greeting, I decided to use one of the sentiments from the Magical Holiday Press Plate set, hot foiling the sentiment first in the traditional way using the press plate, then using the leftover foil piece with the Solid Hot Foil Plate to create a reverse sentiment. I die cut the greeting with the Magical Holiday coordinating dies, popped it up with some foam adhesive, and began building my focal point around the sentiment. I used a variety of liquid and two different heights of foam adhesive for extra dimension. After I had adhered all of my die cuts in a swag arrangement, I added some Clear Drops: Emerald City and a coordinating bright pink bow.
Well, that's all for my project today! I can't believe that we are in the home stretch for Christmas this year... it doesn't seem possible that the year is nearly over. Thanks so much for stopping by today, and have a marvelous day!


