Fun with Stencils two Ways | Isha Gupta
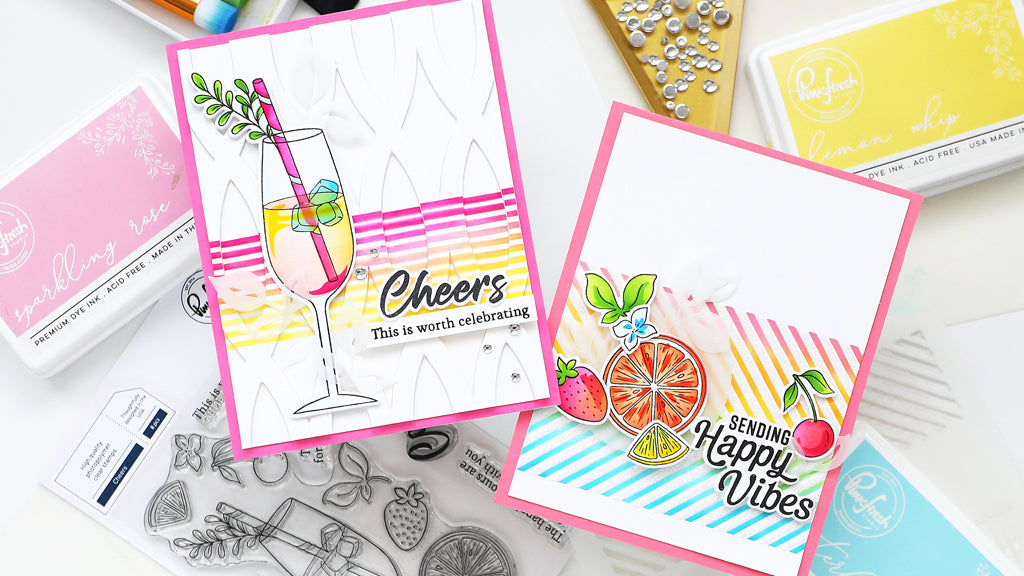
Hello Pinkfresh friends! I am so happy to be back on the blog today with two fun ways to use the new Border Stencils. I paired them with Cheers stamp, dies and stencils. There are so many techniques the stencils can be used for, so they are quite versatile.
The theme for June challenge is Ombré/ Gradients, so I decided to keep my theme based on that.

Sponge Lemon Whip, Marigold, Sparkling Rose and Raspberry Bliss inks onto white card layer using the horizontal stripes border from the stencils.To get a nice and crisp effect, I used the 1/2 inch blender brushes for this process.

Next, use the Twist Pattern press plate without ink to get subtle texture onto the stenciled piece. Die-cut using the co-ordinating dies. Make sure to keep all the negative pieces. Adhere the twisted pattern to a white layer using re-position adhesive and add the negative pieces to the white panel. Add 3d foam to the twist pattern and adhere.

Stamp the images and sentiment from the Cheers stamp set using Detail Black ink. Sponge the images using Lemon Whip, Marigold, Sparkling Rose, Raspberry Bliss, Waterfall, Grassy Knoll, Olive inks through the co-ordinating stencils. Die-cut using the co-ordinating dies. Adhere to the card. I also added some vellum leaves die-cut from the Curvy Leaves dies. To finish, I added nuvo crystal glaze to the ice and some Ice clear drops to the card.
I created another card by using the diagonal stripes to create a pattern.

Sponge Seaside, Waterfall, Key Lime through the stencil. Wipe the stencil and turn it upside down and sponge Sparkling Rose, Apricot, Lemon Whip inks to create the pattern, wipe the stencil.

Next, cover the inked stripes by slightly moving the stencil, apply nuvo glimmer paste through the stencil, let dry. Die-cut a vellum circle from the Mini Slimline Essenential Bundle and create the cluster using the images from the Cheers stamp set. Adhere to the card.

Stamp the sentiment from the Happy Vibes stamp, die-cut using the Happy Vibes dies. To finish, I added some vellum leaves.