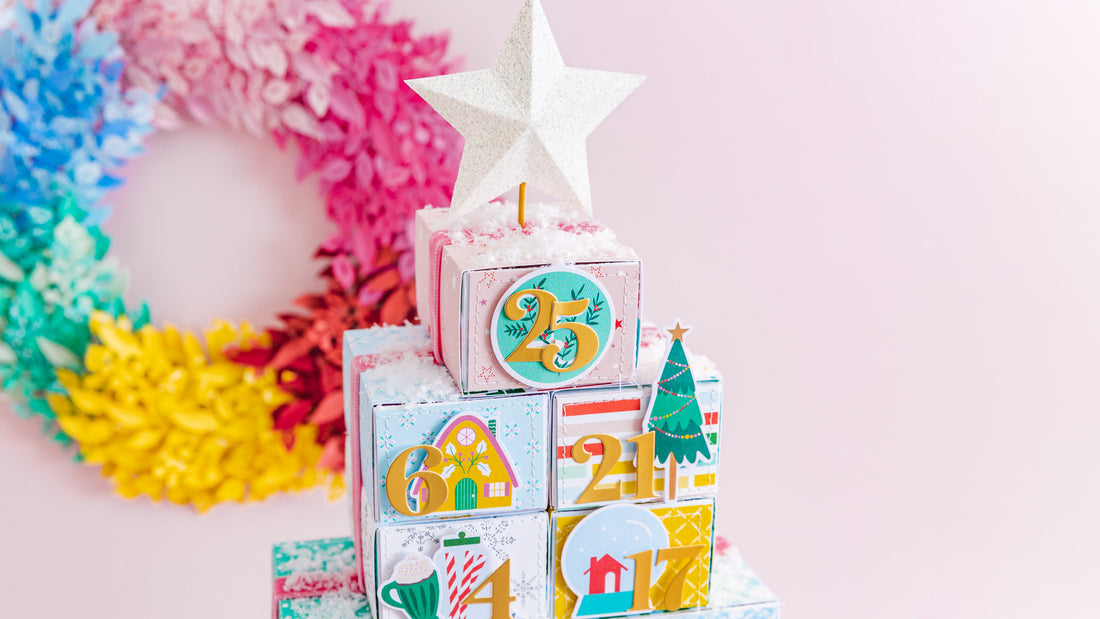
Christmas Tree Advent Calendar with matchboxes | Celes Gonzalo
Happy Monday crafters! It's Celes here! Ready to create a Rainbow Christmas? Do you remember that I made a rainbow Christmas Wreath? Well... today I'm going to show you my Rainbow Christmas Tree Advent Calendar ;) The "Holiday Magic" Collection is so beautiful. I'm in love with it! So bright, so happy, so colorful... Simple amazing!

To make this Advent Calendar I have used matchbox shaped boxes. You have many options to make them: 1-use you electronic cutting machine with a digital cutting file, 2- make them by hand using a scoring and cutting boad/mat, 3- use a metal die and your cutting machine. Also, the size of them is your choice.


In my case I used a cutting file from my ScanNCut. It's a free cut file! You can use it to ;) Just let me know if you need help with it. The final size of my matchbox is: 2 1/4" width x 1 5/8" height x 3 1/2" depth. You can make them bigger or smaller ;)
We need to prepare 25 matchboxes. To make the insert of the box I used white cardstock and to make the outside of the box I used the "Holiday Magic" 12 x 12 Paper Pack.


As you can see I added a sewing details to all the exterior of the boxes. Even for the small front pieces of paper that I cut from the 6 x 6 Paper Pack. I loved the idea of joining them giving it the shape of a Christmas tree. but, as I always tell you, you can customize the idea as much as you want.


Once the mathboxes are ready... it's time to decorate! It means FUN! :) To decorate the front of all mathboxes I used the "Holiday Magic" Die Cut Tags, Ephemera Pack and you can add anything else you like.


The perfect complement for this idea was the Heather Lowercase Die Set. I must confess that it is one of my favorite alphabet dies :) The size of the letters and numbers is wonderful. I cut all the numbers in a matte gold paper... Don't they look beautiful?
To form the Christmas tree, we need to group and glue the matchboxes (from the bottom to up) 1- 4 boxes for the base, in pairs and glue both pairs together (once you have glued them together add a ribbon), 2- 5 boxes, glue them next to each other (once you have glued them together add a ribbon), 3- 8 boxes, make two pairs of 4 boxes and glue both pairs together (once you have glued them together add a ribbon), 4- 3 boxes, glue them next to each other (once you have glued them together add a ribbon), 5- 4 boxes, in pairs and glue both pairs together (once you have glued them together add a ribbon), 6- 1 box, add a ribbon. Once all your pieces are ready, glue them together to form the Christmas tree.

The last detail is a paper star. Add it to the top of the tree using a wooden stick or fine wire. Also, a great die for this is the Essential Shaker Stars Die Set.

Fill it with candies, activities, photos and everything you want! I hope you like this idea!
Thanks for stopping by! Have a great week!


2 Comments
This is absolutely stunning! So talented!
Just an amazing project Cele ! I had to come PIN it 💗 Have fun filling it🎅