Butterfly Paper Clip Mini Album | Susi Becerra
Hello crafty friends! It's Susi here on Pinkfresh Studio scrapbook blog today sharing with you a fun mini album I created using the Happy Heart and Life Right Now collections.I love to use butterflies in my projects so the Butterflies die is perfect to create a cute and fun mini album.

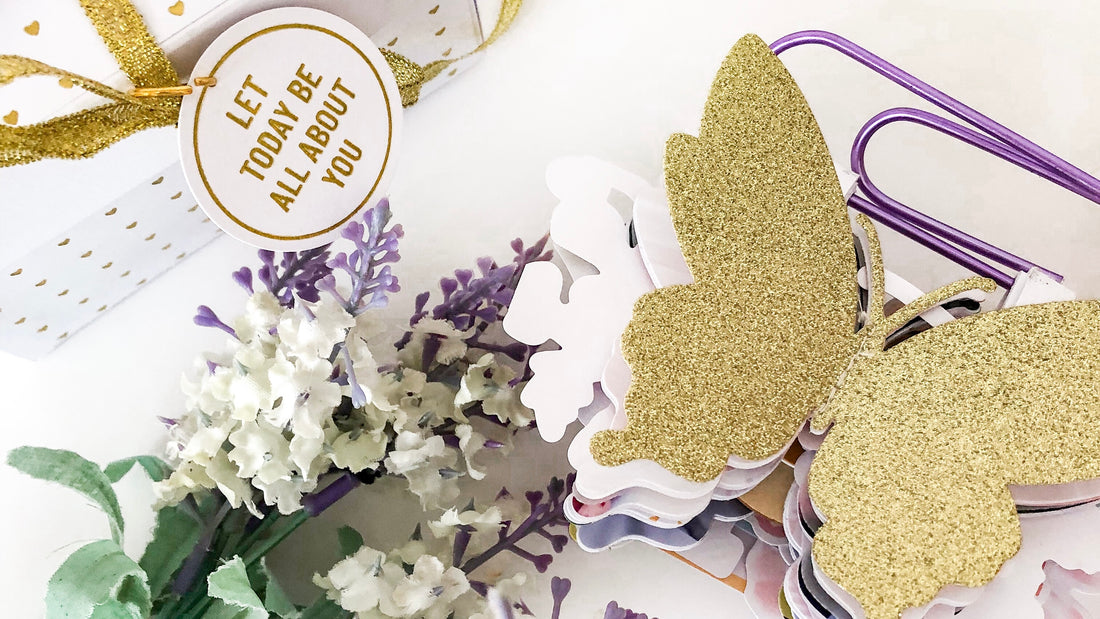
To create the base of my mini album I used the largest butterfly from the Butterflies Die. We are going to need white cardstock to cut eight butterflies and we are going to connect them together using thin, long strips ( 1/2 " w x 2 " h). They are the base of the mini album.

With the base created, I picked my favorite papers from the collections and cut out individual pieces. I cut these from: HAPPY HEART COLLECTION: Favorite Place Paper, Side B New Beginning Paper, Side B Beautiful Moments, Paper,Side B Happy Heart Paper
LIFE RIGHT NOW COLLECTION: Side B Happy Place paper, Perfectly Imperfect paper,Side B Right Now Paper, Side B Go with the Flow Paper, Side B Social Hour Paper, Side B Time for Fun Paper.
I cut the photos using the same die.

To turn them into pages I stacked all four pieces on top of one another and folded the stack in half. This creates a mini album that has 16 pages in total. All the pages are attached to a giant paperclip (4 Inches). This element adds a fun touch to projects like this. To add my pages to this paperclip, I opened the stack of them and slid them through the clip and then folded them back over.

For the cover of my mini I cut a Butterfly piece from gold glitter cardstock and machine stitched in half.
To embellish this album I used a mixture of products from both collections: Happy Heart: Ephemera Pack, Happy Heart: Floral Ephemera, Happy Heart: Title Ephemera, Happy Heart: Wood Accent Stickers, Life Right Now: Ephemera Pack, Life Right Now: Floral Ephemera , Life Right Now: Cipboard flair,


This project would not be complete without a box. To create it we are going to use white cardstock and the Heart Grid Hot Foil.
We are going to need a piece of white cardstock of 10 1/2 "w x 10 1/2" h. Score at 3", 7 1/2" vertically and horizontally. Fold and cut along ONE edge of each corner. Assemble and glue the box. To create the cover box repeat the process with the following measures: 1", 5 1/2", 6 1/2 ".

To embellish the cover box we are going to use the Butterly Layering Stencil Set. We are going to create butterlies using the ink cubes. Two butterflies of each color.
Coral: Coral Reef and Passion Fruit.
Green: Mint and Tidal Pond
Blue:: Sky Blue and Slumber
Purple: Soft Lilac and Candy Violet
Yellow:Lemon Whip and Sweet Mustard
I added a butterly using vellum and white embossing.
Attached all the butterflies in the half to create a lovely rainbow.


I hope you liked it! Thanks for stopping by and see you next time!
Have a great day!
1 comment
This is such a great project idea. Thx for the inspiration Susi. It’s beautiful.