Stenciled backgrounds | Raquel Arribas
Hello again Pinkfresh Friends!
I'm back again on the blog sharing some inspiration on how to step up your backgrounds using stencils.
There is always so much more to stencils than just adding ink, so I thought I'd show you four ideas you so can try them out if you haven't already.
First up, I used one of the Geometric Tile Stencil set to spread white texture paste onto an A2 panel. This subtle texture adds so much interest and can also give you great results to add that extra something to a clean design:

I wanted the background to be the star of the show of this card so I added even more texture and volume using the smallest of the Braided Oval die set on top of the textured background and also foam mounted a rectangle decorative frame I foiled with matte silver glimmer hot foil.

To bring some life to this card, I used the Be Fearless Stamp set with the coordinating stencils and die along with Cherry Blossom, Peony, Begonia, Sage and Spruce Tips. I always love to add white heat embossedimages on vellum to my cards, so this time I used the Never Give up stamp to create some extra white heat embossed vellum flowers I tucked under the stamped images.
I arranged my flowers along side the oval braided die cut and silver heat embossed the sentiment from the Artsy Floral stamp set. Lastly I added some Glittering Mountains Ombre Glitter drops.

For my next project I used again one of the Geometric Tile stencils to just add some gradient colors on an A2 panel. I didn't want to add too many colors so I kept my background quite clean. Then I cut out a hexagon out of this panel using one of the Nested Hexagons die set. As on my previous card, I added some white texture paste with another layer of the Geometric Tile Stencil set and placed this piece under my front panel:

To embellish this card, I foam mounted some beautiful flowers from the Artsy Floral stamp set. I colored them using the coordinating stencils with Coral Reef, Passion Fruit, Sunkissed, Mimosa, Aquamarine and Waterfall.

Next up I used the Modern Rug Stencil set. I've used some fresh summer colors (Limoncello, Cherry Blossom, Peony, Fresh Pear and Olive ) and created this super fun design. I just love the cool modern look to these stencils

Once I colored my A2 panel I used the rectangle from the Side Slice die to cut out a rectangle opening in the center so the modern rug pattern became a frame. I foam mounted this rectangle onto another A2 panel with another white texture paste pattern I applied using again the Geometric Tile Stencil.

This rectangle frame was perfect for the Beautiful branch so I went ahead and foiled this branch using the Beautiful Branch Press Plate with Glimmer Satin Rose gold foil. I colored this image with the Coordinating stencils and Sweet Mustard, Cherry Blossom, Begonia, Sunkissed, Sage and Spruce Tips. I added some white heat embossed Beautiful Branches on vellum and heat enbossed my sentiment in copper embossing powder. This sentiment is from the Delighted for you stamp set. Lastly I added some Sparkling Champagne Metallic Pearls.
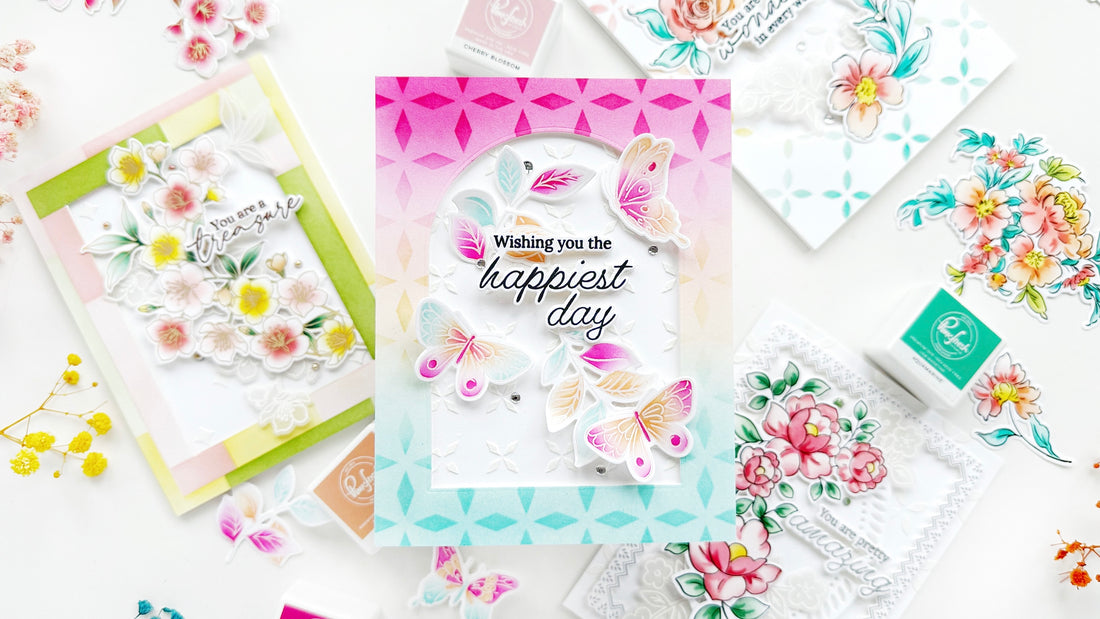
For my last project I ink blended an A2 panel twice:

I just inked the A2 panel without stencils with Raspberry Bliss, Sunkissed and Ocean Breeze. Then I placed one of the stencils from the Geometric Tile stencil set on top and inked this panel again with the same colors. For this panel, I used one of the Nested arches die set to create an oval frame.

This time I used one of the Kaleidoscope stencils to add some white texture paste onto an A2 piece of cardstock I placed under the panel I had just created with the arch frame.
Next I foam mounted some leaves and butterflies I had white heat embossed from the Fluttering Butterfly stamp set and colored with its coordinating stencils using the exact same colors I had used for my background. The sentiment is from the Artsy Floral Stamp set.
I hope these projects inspired you and have a go creating some projects using stencils.
Thank you so much for stopping by and happy crafting!
Raquel