Merry Pastel Christmas Trees | Anne Fiene
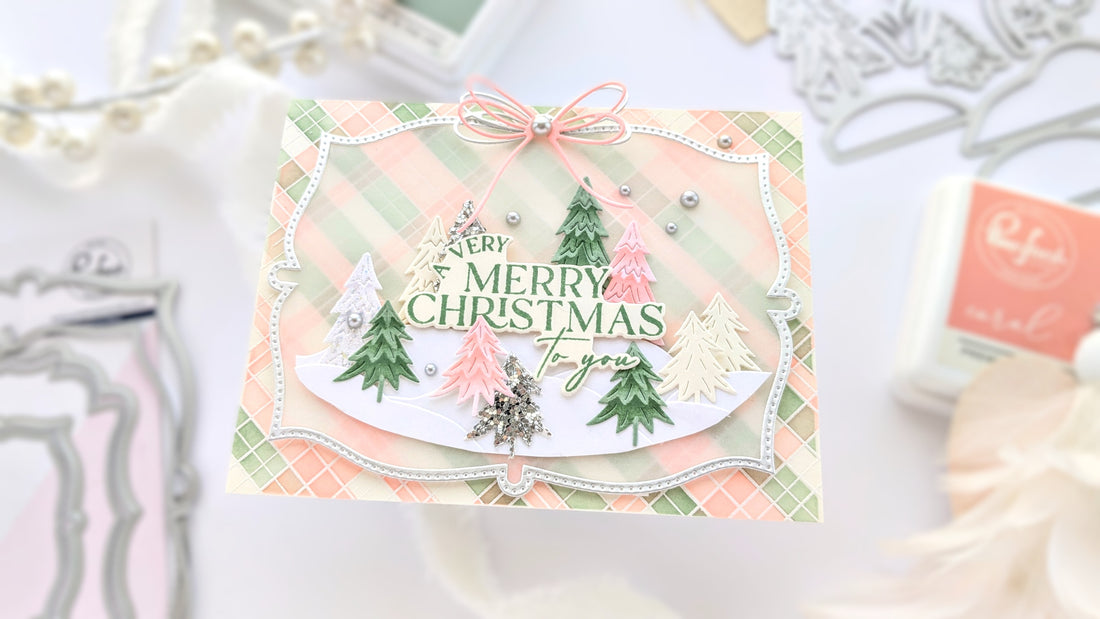
Hi everyone! I've got a sweet holiday card to share today. I made today's card with the new Dotted Fancy Frames and Trees die. This was not the card I thought I was going to make, but I ended up liking it! It reminds me of a Christmas tree lot on a Charlie Brown special.
I started with the Trees die and made a bunch of trees. I just wanted the small ones, so I put a strip of white cardstock behind the smaller trees. Then I pulled out the Trees stencil to color them; at first, they were bright red and light purple. But after sitting with them a bit, I decided that I was really looking for something softer so I die-cut out more trees to color. I used Pinkfresh's Sage, Ballet Slipper & Coral Reef, silver glitter specialty paper (like this) and ivory-colored paper, and I applied glitter gel on a couple of plain white trees. Then, I had a nice pile of trees ready and set them aside.

I originally wanted to make one of those graphic lay-the-objects-out-into-a-box shape. Graphic in design and kind of cool. But as I was going along, I just felt like I wanted it to be "soft" and "pretty." And I had a pastel Christmas tree lot scene by the time I was done! These things happen.
I made the background next. I grabbed a sheet of (Simon Says Stamp) Ivory cardstock to put in the MISTI. And white heat embossed the Dainty Plaid stamp. Then, I used two stencils from the accompanying stencil set with Coral Reef and Sage inks. Then, it was adhered to an A2-sized cardbase.
So, the next thing I did was grab a sheet of vellum and use a die from PFS's new Dotted Fancy Frames to cut out a panel. I also used the fancy frames—two of them—with silver specialty paper for a framing piece to go on the vellum. And I set it aside for now.

I used the Trees die again to die-cut a bunch of snow mounds. I laid them down so they overlapped, held them down with my hand, and used dots of glue to adhere them together. Then, I grabbed a pair of scissors and cut the bottom off in an oval arc that would fit inside the Dotted Fancy Frame. I used double-sided tape to adhere it to the vellum panel.
Then, I used foam tape to stick the vellum fancy panel to my cardbase. I put good-sized pieces under where the snow mounds were and a few tiny pieces under the silver frame to keep it up off the card. Those pieces might have been slightly bigger than the frame, but they really didn't show. I used 40lb heavy-weight vellum.

I got my sentiment from the Magical Holiday stamp and die sets. I used more foam tape to adhere it to my card above the "snow." Then, I arranged the trees and glued them down.
I used the bow die from PFS's Wrap Around Elements and placed some matte silver Metallic pearls. And I was done with my card.
I hope some of these design ideas have inspired you to make something new today! Thanks so much for stopping by!
-Anne


